Inventory serialization is the process of assigning an individual products to serial numbers, which are often used for measuring quality control, issuing a product warranty, or tracking order returns.
Serialization is available for Mobile Fulfillment. The mobile workflows are similar to the desktop workflows, which are outlined in this topic.
Serial numbers can only be assigned to Fulfillment products that do not have existing inventory. The best practice is to enable and assign serial numbers during product creation. The following section will guide you through this process.
1 Go to Administration > Products.
2 Create a Fulfillment product.
For more information on creating Fulfillment products, see Create a fulfillment or rental product.
3 Enable the Has Serial Numbers setting on the Inventory tab.
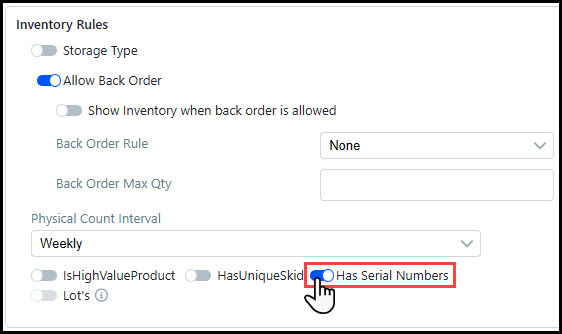
This setting will be disabled if the product has existing skids.
4 Save the product.
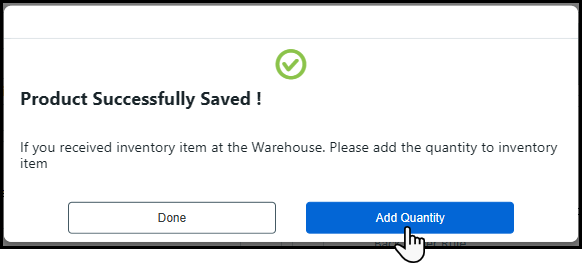
5 Click Add Quantity in the Product Saved Successfully window. This will re-direct you to the Inventory Receive page.
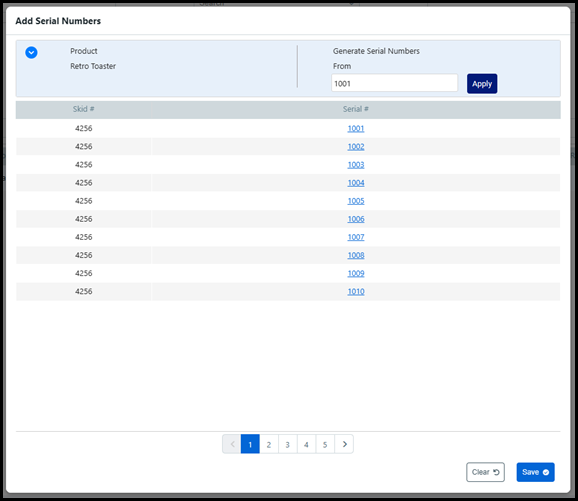
6 Add inventory to the product. When you receive inventory for the product, you will be prompted to assign serial numbers to each item in the Add Serial Numbers window.
For more
information on receiving inventory for a product, see Receive
items into inventory.
You will not be able to release a serialized item until it is assigned
a serial number.
7 Choose the appropriate skid from the Select Skid to enter Serial Numbers drop-down list.
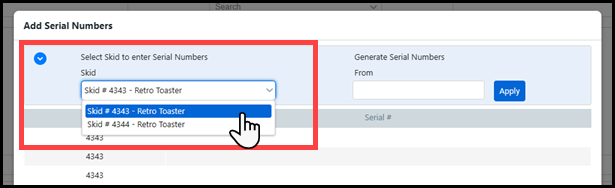
This step is only necessary if you received inventory for more than one skid.
8 To auto-generate serial numbers, enter the first serial number in the Generate Serial Numbers From field and click Apply.

Serial numbers will be automatically generated in numeric order, so they must end with a number.
9 To manually enter a serial number, select the row in the Serial # column and enter the custom serial number.
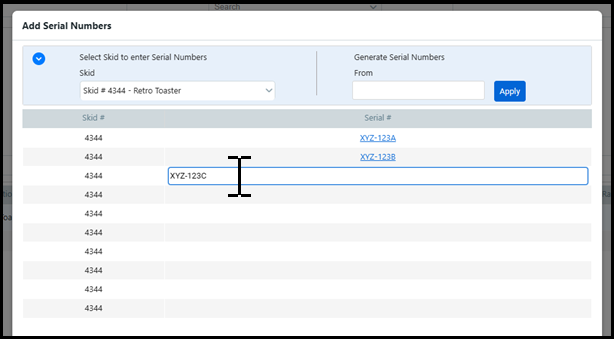
You will need to enter a serial number for every item before you can exit the Add Serial Numbers window.
10 Click Save.
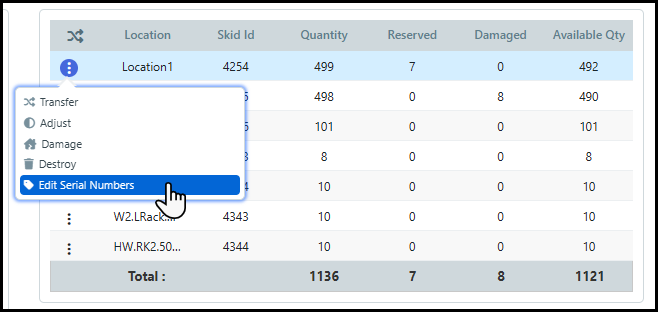
1 Go to Administration > Products.
2 Click the serialized product in the Manage Products table.
3 Select the Inventory tab.
4 Hover on ![]() for the appropriate row in the Inventory
Management table.
for the appropriate row in the Inventory
Management table.
5 Choose Edit Serial Numbers from the Quick Access Menu.
6 Click the serial number you want to edit.
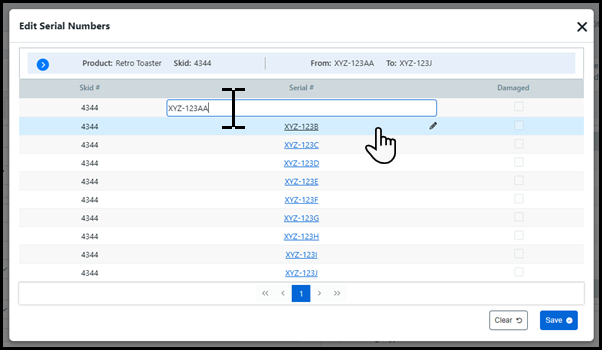
7 Edit the serial number and press enter on your keyboard.
8 Click Save when you are finished editing the serial numbers.
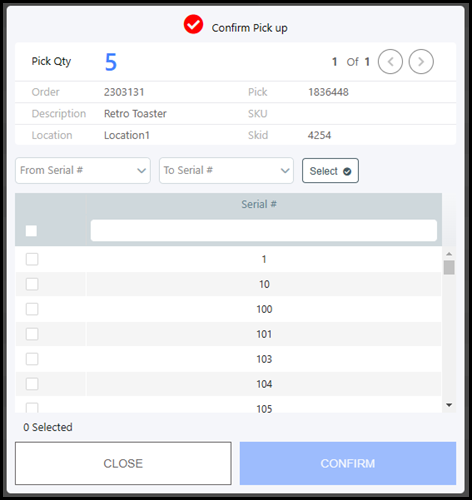
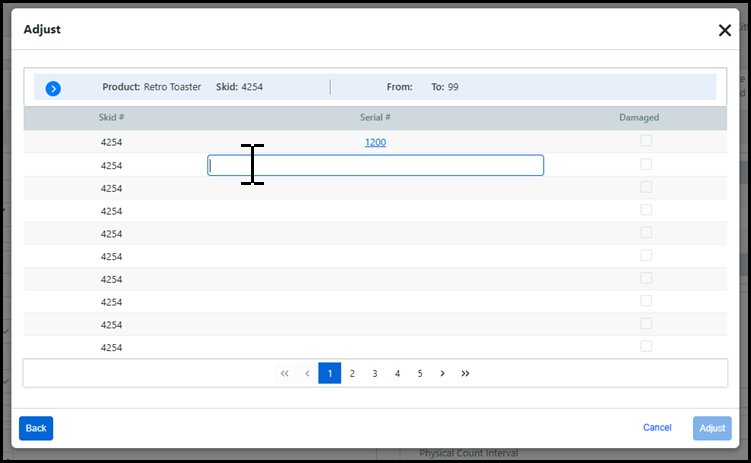
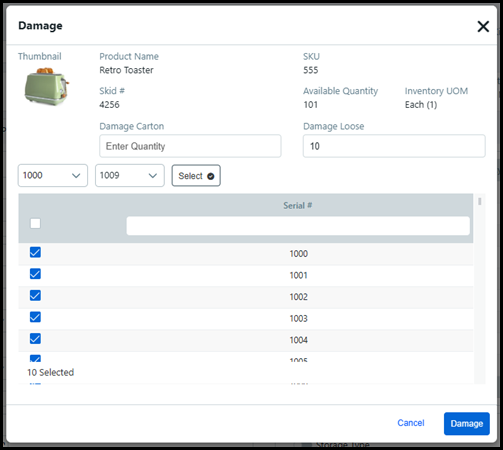
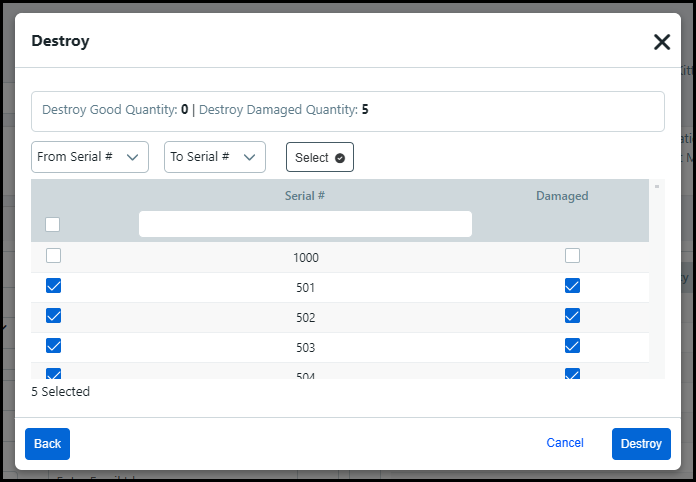
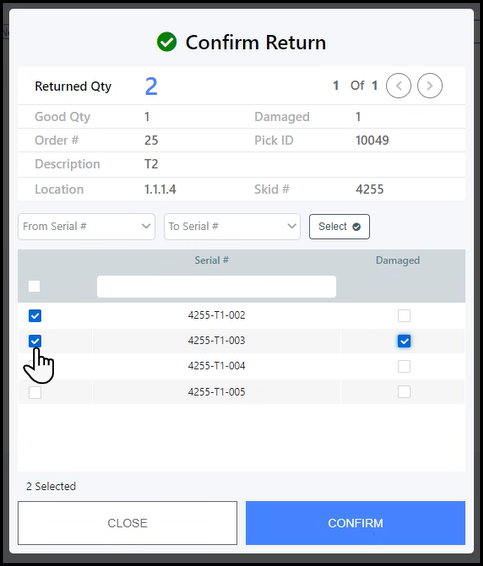
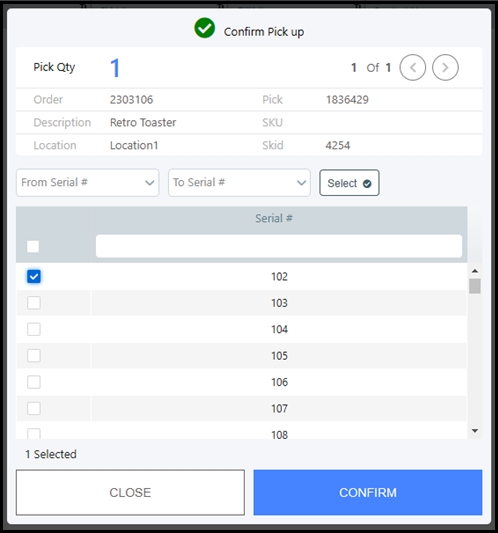
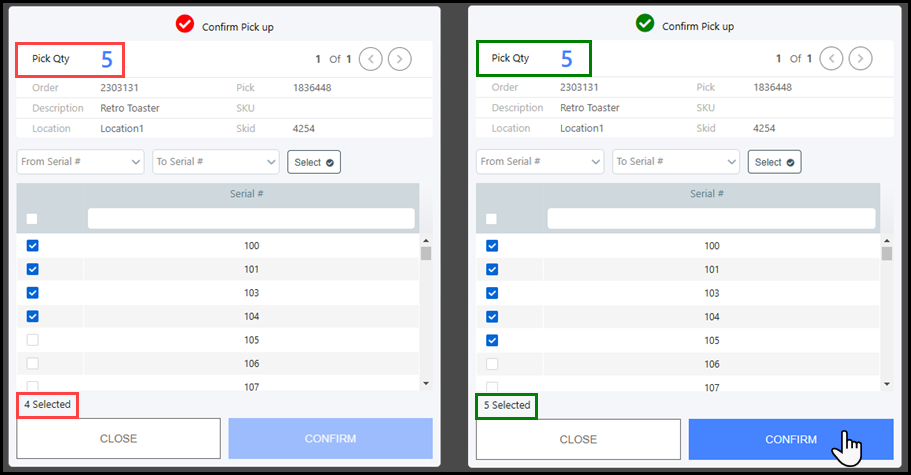
Serial numbers must be tracked during any interaction with serialized products. There are three common ways to select a serial number from the Serial Number table.
1 Click the check-box for the appropriate serial number(s).
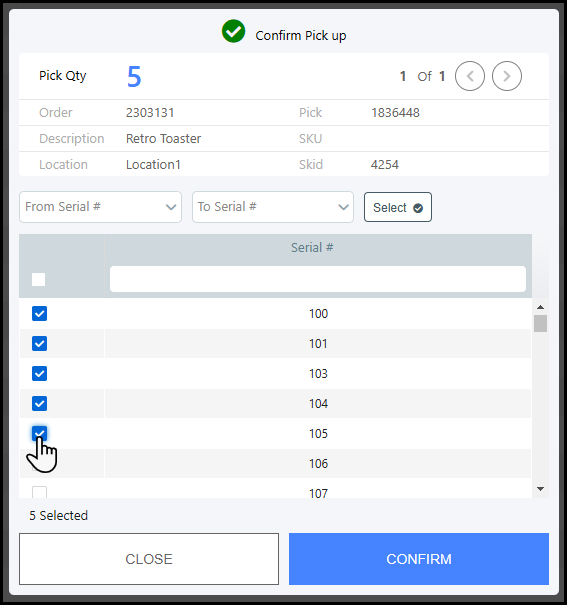
2 Enter the serial number into the Serial # search bar and click the appropriate check-box.

3 Complete the From Serial # and To Serial # fields to select a range of serial numbers.
A counter at the bottom of the table will show you
how many serial numbers are selected.
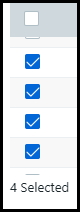
You will not be able to exit the window with the Serial
Number table until you select the correct amount of serial numbers.
Common workflows where serial numbers must be tracked include:

 When
a buyer orders a serialized product.
When
a buyer orders a serialized product.